
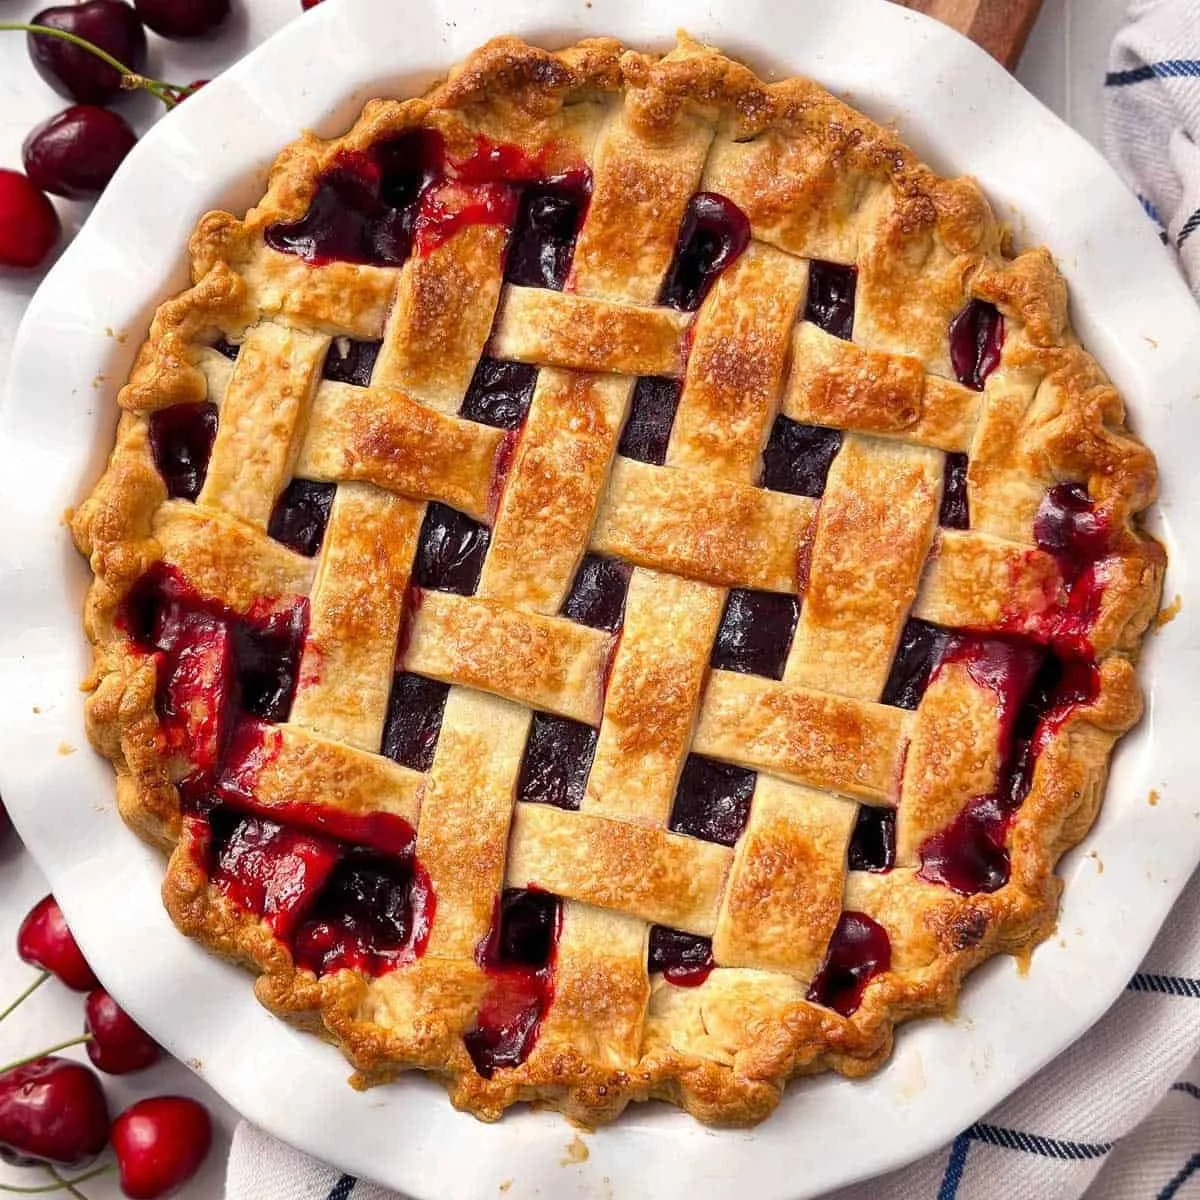
Classic Cherry Pie is a delightful dessert that captures the essence of summer in every bite. This traditional favorite boasts a crispy, buttery crust enveloping a luscious, juicy filling made from sweet or sour cherries. The balance of tartness and sweetness, paired with just a hint of warm spices, makes it an unforgettable treat. Whether you’re enjoying a slice on a warm afternoon or sharing it during family gatherings, Classic Cherry Pie is sure to evoke nostalgia and comfort, making it a must-try recipe. In this guide, we’ll provide a step-by-step approach to crafting this delicious pie, ensuring that you can savor the sweet moments in the kitchen and with loved ones.
Ingredients
To create the perfect Classic Cherry Pie, you’ll need the following ingredients, each selected for their unique qualities that contribute to the pie’s overall appeal:
- 1 pie crust for double crust pie: A buttery, flaky crust that forms the delicious foundation of your pie.
- 5 cups pitted sweet or sour cherries (about 1.5-2 lbs; OR 1.5 lbs frozen; OR 3 (14.5-oz) cans cherries): These juicy cherries burst with flavor and provide the pie’s vibrant filling. If using canned cherries, ensure you drain and rinse them well.
- 1 cup sugar (for sweet cherries use 3/4 cup): Adds sweetness to counterbalance the tartness of the cherries.
- 1 teaspoon vanilla extract: Enhances the overall flavor profile of the pie.
- 1/8 teaspoon almond extract (optional): Adds a subtle nutty note that beautifully complements the cherries.
- 1/2 teaspoon ground cinnamon (optional): Introduces warmth and depth to the flavor.
- 1/8 teaspoon salt: Balances sweetness and enhances flavors.
- 1/4 cup cornstarch (or more as needed): Acts as a thickening agent to achieve a perfectly jammy filling.
- 4 tablespoons cool water: Used to create a cornstarch slurry.
- 2 tablespoons lemon juice: Brightens the flavor, especially if using sweet cherries.
- 1 egg white (mixed with 1 teaspoon water; brush pastry with heavy cream if not wanting to use egg): Gives the crust a beautiful golden hue when baked.
- 1 teaspoon granulated sugar (or more to taste): For sprinkling on top, adding sweetness and a delightful crunch.
Step-by-Step Directions
Note about crust:
If making a homemade crust, ensure to make it at least two hours in advance to ensure adequate chilling time!
Cook cherries:
Start by placing the pitted cherries in a wide pan along with the sugar, vanilla extract, and almond extract. Add cinnamon if you choose to include it, along with salt. Bring this mixture to a boil over medium-high heat. Once it reaches a boil, reduce the heat to medium-low and simmer, uncovered, for 5-10 minutes until the cherries have released their juices and softened.
Thicken filling:
Whisk the cornstarch into the cool water until smooth to create a slurry. Remove the pan with the cherries from heat, and quickly stir in the cornstarch mixture, ensuring it is fully incorporated into the juices. Place the pan back over medium-low heat and continue to simmer the filling until the juices thicken, about 2-3 minutes.
Taste and adjust:
Once thickened, give the filling a taste. Adjust the flavor by adding lemon juice as needed (tart cherries may not require any additional lemon). If the filling is too thick, thin it out with a tablespoon or two of water. Conversely, if it’s too thin, thicken it with a bit more cornstarch slurry. Remember that the filling will continue to thicken as it cools; aim for a jammy consistency.
Cool filling:
Transfer the filling to a shallow bowl if needed to expedite the cooling process, stirring intermittently until it reaches room temperature.
Bottom crust:
Once your pie crust is adequately chilled for at least two hours, and the filling cools, it’s time to assemble your pie. First, place a well-buttered 9-inch pie dish in the freezer for 15 minutes before rolling out the bottom crust into a circle about 10 inches in diameter. Fit the crust into the pie dish, leaving any overhang attached, and return it to the fridge to chill for another 15 minutes.
Prep oven:
While your bottom crust is chilling, place a foil-lined baking sheet in the lower third of your oven. Preheat the oven to 425°F (220°C) to create an ideal baking environment for your pie.
Top crust:
Roll out the top crust into a circle of the same diameter, cutting it into strips that are 1/3 – 1/2 inch wide. Set this in the fridge until you’re ready to use it.
Assemble:
Once the bottom crust has chilled, remove it from the fridge. Carefully spread the cooled cherry filling evenly in the bottom crust, making sure to eliminate any air bubbles. Lay the strips of the top crust over the filling in a lattice pattern, folding the edges of both crusts and crimping them together to seal. Brush a thin layer of the egg white wash over the crust and sprinkle with granulated sugar for a touch of sparkle.
Bake:
Place the pie dish on the prepared baking sheet in the oven and bake at 425°F for 15-20 minutes. Then, lower the heat to 375°F (190°C) without opening the oven door, and continue baking for an additional 30-40 minutes. If the edges brown too quickly, cover them with foil or a pie shield. The pie is done when the crust is flaky and golden brown, and the filling begins bubbling at the edges.
Cool:
When baking is complete, turn off the oven and carefully remove the pie using thick oven mitts. Remove any foil or shields, and allow the pie to cool on a rack for at least two hours before slicing.
Tips & Tricks
To elevate your Classic Cherry Pie, consider these additional tips:
- Choose ripe cherries: The freshness can significantly impact the flavor.
- Add spices: Experimenting with nutmeg or cloves can introduce new dimensions to the filling.
- Chill your ingredients: Keeping your dough and filling cool helps maintain the pie’s flaky crust.
- Create a lattice crust: It’s visually appealing and allows steam to escape, preventing a soggy bottom.
- Experiment with crust type: While traditional pie crust is fantastic, try using a graham cracker crust or a crumble topping for a twist.
Serving Suggestions & Pairings
Classic Cherry Pie serves well as a delightful dessert for many occasions. Pair it with a scoop of vanilla ice cream for a satisfying contrast. It also goes beautifully with a dollop of freshly whipped cream. Serve it for summer picnics, holiday gatherings, or simply as a family treat after dinner. The vibrant red of the filling adds a festive touch, making it appropriate for any celebration.
Nutritional Information
A slice of Classic Cherry Pie is approximately 300-400 calories, depending on the thickness of the crust and quantity of filling. It contains essential nutrients from the cherries, including vitamin C and fiber. While pie is a treat, balancing it with a wholesome meal can help you enjoy this indulgence guilt-free.
Storing Tips & Variations
To store your Classic Cherry Pie, keep it in the refrigerator covered with plastic wrap for up to 3-4 days. If you’d like to freeze it, wrap it tightly in aluminum foil or plastic wrap and store it in an airtight container for up to 3 months. When reheating, place it in a preheated oven at 350°F (175°C) until warmed through.
Variations could include combining cherries with other fruits like blueberries or raspberries for a mixed berry pie. You can also create a twist by using almond flour or whole wheat flour for a healthier crust option.
Conclusion
Classic Cherry Pie is not just a dessert; it offers a warm embrace of nostalgia and comfort with each slice. Whether you’re a seasoned baker or a novice, this recipe is easily approachable and sure to impress. We encourage you to try it out, share your experience, and enjoy the sweet moments it brings into your life.
FAQs
1. Can I use frozen cherries for this recipe?
Yes! Frozen cherries are a great alternative and will yield a delicious pie. Just ensure they are fully thawed and drained before use.
2. What’s the best way to pit cherries?
A cherry pitter is the easiest tool for the job. If you don’t have one, you can use a knife to carefully cut around the pit.
3. Can I make the pie crust ahead of time?
Absolutely! You can prepare your pie crust in advance, wrap it in plastic wrap, and store it in the refrigerator for up to three days or freeze it for longer storage.
4. How do I know when my pie is done?
The pie is finished baking when the crust turns golden brown and the filling bubbles around the edges. The filling should also appear thick and slightly glossy.
5. What can I substitute for cornstarch?
You can use all-purpose flour instead of cornstarch, but keep in mind that you may need to adjust the quantity, as flour is less effective as a thickener. Start with double the amount and adjust to reach the desired consistency.
Try your hand at this Classic Cherry Pie and elevate your baking skills while indulging in a timeless favorite. Your family and friends will be delighted!
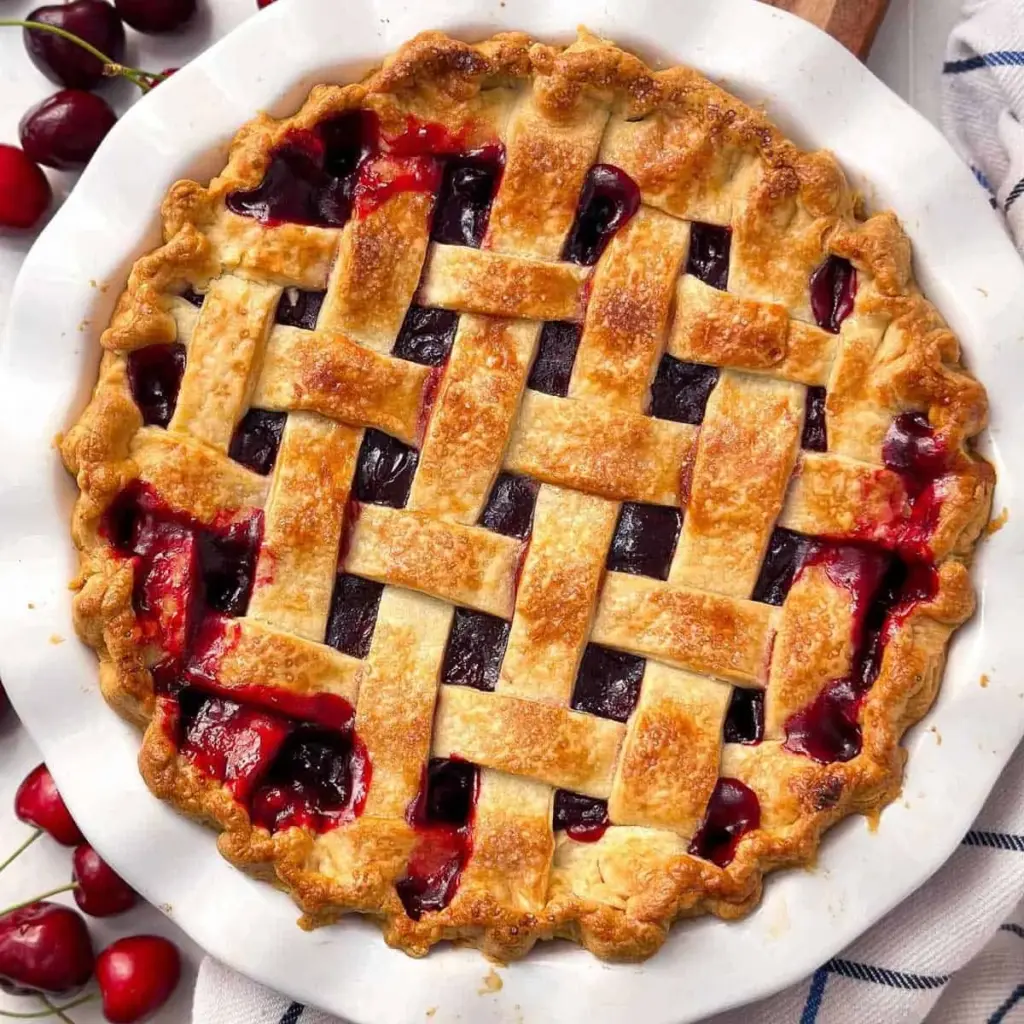
Classic Cherry Pie
Ingredients
Method
- If making a homemade crust, prepare it at least two hours in advance to chill.
- Place a well-buttered 9-inch pie dish in the freezer for 15 minutes before rolling out the crust.
- In a wide pan, add pitted cherries, sugar, vanilla extract, almond extract, cinnamon (if using), and salt.
- Bring to a boil over medium-high heat, then reduce heat to medium-low and simmer uncovered for 5-10 minutes.
- Whisk cornstarch with cool water until smooth to create a slurry.
- Remove the cherries from heat, stir in the cornstarch mixture, and return to medium-low heat to thicken for 2-3 minutes.
- Transfer the filling to a shallow bowl to cool, stirring intermittently until room temperature.
- When the crust is chilled, roll it into a circle about 10 inches in diameter and fit into the pie dish.
- Spread the cooled cherry filling evenly, and lay the top crust in a lattice pattern, sealing both edges.
- Brush with the egg white wash and sprinkle with sugar.
- Bake at 425°F for 15-20 minutes, reduce heat to 375°F, and bake for another 30-40 minutes until golden brown.
- Allow the pie to cool on a rack for at least two hours before slicing.


Leave a Reply